Designer's Notes
Notes on Europa Games
All designer's notes are by John M. Astell unless indicated otherwise.
 A Winter War
House Rules and More
The following represent work and suggestions by Gary Stagliano, the designer of A Winter War, and John M. Astell. Items labeled "GS Note" are taken from what Gary Stagliano thought about the item.
1. CD Combat Strengths. (Experimental rule adapted from Second Front Optional Rule 43G3.) Coast Defenses in a hex (any hex, not just ports) have a defense strength for ground combat and overrun purposes equal to half their CD level (Do not round fractions). If the hex's CD has a defense strength of 1 or greater, it is treated the same as a 1-RE field artillery unit for purposes of ground combat and overruns.
If this optional rule is used, remove the Finnish 0-1-0 artillery unit from the order of battle.
GS Note: "Try this optional rule suggestion".
2. Restricted Replacements.
Soviet. The Soviet player may replace only a limited number of units of certain unit types:
- Only one RE of artillery may be replaced per month.
- Only one NKVD political troops RE may be replaced per month.
- Only one airborne/para-infantry may be replaced per three month six turn period.
- Only one combat or assault engineer RE may be replaced per month.
- Only three RE of winterized units (including all winter capable units) may be replaced/rebuilt per month.
- Only one RE of armor may be replaced per month.
Finnish. The Finnish Player may not replace any artillery units until Mar I 40.
GS Note: Gary considered this "additional AWW errata and modifications".
3. Western Intervention. In TEM 61, Gary introduced some changes to the Western Intervention rules in AWW. A die roll of 3 (on 2D6) results in Western Intervention (which I will call "full Western Intervention"), although the Soviet strategic reserve is not released until a Western ground unit leaves the Arctic. (This prevents the cruel [for the Finns] situation of an early Western intervention resulting in hordes of Soviets swamping Finland.)
Also new is what I call "limited Western Intervention," in which a die roll of 2 results in two Western air units joining the Finnish air force.
All this is fine and good. I have two suggestions/house rules for this:
3A. Give the Finnish player a little more control over intervention.
If limited intervention is rolled, the Finnish player can decline it and continue to roll for Western Intervention in later turns (obviously in the hopes that full intervention might be rolled later).
If full intervention is rolled, the Finnish player can accept it, change it to limited intervention, or decline it. If declined, Western Intervention cannot occur for the rest of the game.
The reason for this suggestion is that Western Intervention depended upon the attitude and cooperation of Finland. Although the Allies had their own goals (separate from Finland) for intervening, such as shutting down iron ore shipments to Germany via Narvik and even occupying the Swedish iron ore mines, their plans required Finland to invite an intervention force. Thus, when Mannerheim appealed for aid on 29 Jan. 1940, this revived Anglo-French interest in intervention and put in motion a process that would have dispatched a force to Scandinavia had not the Allies took so long to organize it that the war ended in the meantime.
GS note on 3A: "Excellent suggestions".
3B. The rule on not releasing the Soviet strategic reserve until a Western ground unit leaves the Arctic is too much of a sure thing. Certainly it will cause the Finnish player to preferentially have Western units take over for the Finns in the Arctic as much as possible, thereby releasing Finnish units to go south.
Make the release of the strategic reserve conditional on a die roll at the start of each Soviet initial phase once full Western Intervention has occurred. Roll two dice; the strategic reserve is released on a roll of 13 or greater. Modify the roll as follows (modifiers are not cumulative; simply use the biggest modifier that applies):
+1 if there are any Western units in the Finnish Arctic.
+2 if there are any Western units in the Finnish Arctic adjacent to Soviet units.
+5 if there are any Western units in Finland south of the Arctic.
+8 if there are any Western units in Finland south of the Arctic adjacent to Soviet units.
GS note on 3B: "I agree here, I do not like sure things...".
4. Order of Battle. Ongoing OB research indicates that the 1-6 engineer forces in the Soviet 8th and 9th Armies were accounted for in the engineer reinforcements.
Remove the two 1-6 Eng lll 8 and 9 from the initial order of battle and place them in the strategic reserve. These two units are released on Dec II 39.
The Dec II 39 Eng lll 13 now arrives on Feb I 40 with the rest of the 13th Army's auxiliary troops.
GS Note: Gary considered this "additional AWW errata and modifications".
5. Additional Soviet Deployment Restrictions for the 8th and 9th Armies. Except for Winter-Capable and NKVD units, Soviet units may only deploy in or adjacent to hexes containing a road or rail line. Winter-capable and NKVD units may deploy anywhere in their army's deployment zone.
GS Note: Gary considered this "additional AWW errata and modifications".
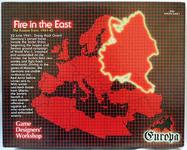 Fire in the East/Scorched Earth
German Player Attack Tactics, 1941
Which is better for the Germans in 1941, one 6:1 attack or two 3:1 attacks?
Surprising for many players, two 3:1 attacks usually help the Germans better than one 6:1 attack in good weather in 1941. A 6:1 is guaranteed not only to take the hex (we're ignoring things like die roll modifications for this discussion) but also to give a good chance of inflicting enemy losses without taking any losses yourself. A 3:1 isn't guaranteed to take the hex and runs the chance of the attacker taking losses. Nevertheless, two 3:1s are usually better!
Let's do the numbers first. For illustration purposes, the German player has forces totaling 48 attack strength points. He can use all 48 points to attack one hex with 8 Soviet defense points in it (48:8, one 6:1) or can make two 24-point attacks, each on a different hex with 8 Soviet defense points in it (24:8, two 3:1s).
A 3:1 attack has the following possible results:
| Chance | Result | DL | ACH | AL |
|---|---|---|---|---|
| 1/6 | EX | 8 | Yes | 8 |
| 1/6 | AS | 0 | No | 0 |
| 1/6 | HX | 8 | Yes | 4 |
| 2/6 | DR | 0 | Yes | 0 |
| 1/6 | DH | 4 | Yes | 0 |
(DL: Defender strength losses if result occurs; ACH: Attack captures attacked hex; AL: Attacker strength losses)
On average for one 3:1:
- The defender will lose 8/6 + 8/6 + 4/6 = 20/6 = 3.33 points.
- The attacker will take the hex 5/6 (83.33%) of the time.
- The attacker will lose 8/6 + 4/6 = 12/6 = 2 points.
- The net defender losses will be 3.33 - 2 = 1.33 points.
But, two 3:1s occur: On average for the total of these attacks:
- The defender will lose 6.67 points.
- The attacker will take 1.67 hexes.
- The attacker will lose 4 points.
- The net defender losses will be 2.67 points.
A 6:1 attack has the following possible results:
| Chance | Result | DL | ACH | AL |
|---|---|---|---|---|
| 2/6 | DR | 0 | Yes | 0 |
| 1/6 | DH | 4 | Yes | 0 |
| 3/6 | DE | 8 | Yes | 0 |
On average:
- The defender will lose 4/6 + 24/6 = 28/6 = 4.67 points.
- The attacker will take one hex 6/6 (100%) of the time.
- The attacker will lose no points.
- The net defender losses will be 4.67 points.
Now, let's apply this to the game:
Summer 1941: In general, take two 3:1s instead of one 6:1. This causes higher overall losses to the defender (6.67 vs. 4.67) and gains more territory (1.67 hexes vs. 1 hex). The higher defender losses will strain the Soviets more, as the Red Army is at its weakest state in 1941. Perhaps at least as important as inflicting losses on the enemy, the more territory you gain in combat makes it the more likely your c/m forces can break out and exploit, moving east or pocketing enemy forces.
The potential drawback is that the attacker incurs a fair amount of losses. While absolute defender losses are higher (6.67 vs. 4.67), net defender losses are lower (2.67 vs. 4.67). In other words, the Germans are pursuing an attritional strategy. This is quite possible in the summer of 1941, for the Germans are at their strongest. If the strategy works, they might win. However, to make this work, the Germans shouldn't just go around making random 3:1 attacks, as then they are incurring the attrition without sufficient gain. Instead, the Germans should deliberately adopt an attritional strategy and maximize their play for it.
Winter 1941/42: Poor weather limits mobility and hence exploitation possibilities. If the Red Army is neither seriously hurt nor in a bad position by winter, it seems best to abandon the attritional strategy, concentrate on defensive measures, and inflict overall greater losses. This implies taking one 6:1 vice two 3:1s, inflicting greater net losses on the Soviets (4.67 vs. 2.67), at no cost (0 losses) for the Germans. On the other hand, if the Soviets are already hurting, it's best to continue the attritional strategy.
Thereafter: Good weather returns in summer 1942, but the strategy to follow depends upon how well things have gone up to this point. If the Red Army is weak, then a return to the attritional strategy can do it in; otherwise it can do the Germans more harm than good.
 First to Fight
Hints for Playing 2-Week Turn FTF
The Europa boilerplate says things like: "Each individual Europa game deals with a specific campaign in detail. To provide detailed historical accuracy or playability, individual games may use differing unit scales, time scales, or specialized rules."
FTF follows this tradition by using 3-day turns instead of 2-week turns. However, the game is playable using 2-week turns (and historically most of the action occurs in two turns at this scale). The original Case White contained some hints on how to convert the game to two-week turns, and here are a corresponding set of hints do the same for FTF.
Turns. Turns represent 2 weeks, not 3 days. The game starts with the Sep I 39 turn.
Movement and ZOCs. There is no cost to enter ZOCs. Use ZOC rules/costs from a 2-week-turn game like Second Front or Balkan Front. Do not use the FTF c/m exploitation limit (1/2 movement in exploitation phase).
Rail Capacities.
- Poland 20
- Germany 60. However, only 20 may be used for entirely on-map rail movement. The remainder can't be used except for transfers to/from the Westwall.
- USSR 15
Clearing Rail Lines. This rule is not needed at the 2-week-turn level.
Supply. Use the FTF supply rule, except use the supply effects portion from SF or BF instead.
Construction. Use the construction engineer rule from SF or BF.
Unit Breakdowns. Allow units to break down; use an appropriate rule from SF or BF.
Weather. Use the weather rule from SF or FITE/SE (but not BF, since it doesn't cover the correct zones or seasons for FTF). The weather for Sep I 39 in zones C and D is automatically clear.
Surprise Offensive. Use a surprise turn for the Germans at the start of the game, immediately prior to their Sep I 39 turn. Use the rules for such a turn from BF or FITE/SE (i.e., like a regular player turn except without an exploitation phase). Only the following Germans forces get to use the surprise turn: AG North, AG South, 7th Flieger Division, Luftflotte 1, and Luftflotte 4. During the surprise turn, these forces may operate only in Poland, Slovakia, and eastern Germany (which you can define as the WKs in which these forces deploy, which I believe are WK I, II, III, IV, VIII, XVII, XVIII, and Bohemia-Moravia).
French Intervention. Check for French intervention each game turn starting with Sep II 39 (instead of FTF turn 4). Use the regular intervention modifiers, except ignore those for FTF turns 4 and 5. Instead, use a -1 for Sep II 39.
Game Length. End the game on Dec II 39. The game can end sooner:
- If the German Westwall strength reaches 0, the game ends immediately (and the Polish player wins a decisive victory).
- If at the end of any game turn the Polish government has been evacuated or captured AND there are no Polish units remaining in play on the map, the game ends at that point.
Victory Chart. Ignore the German VP awards for the Polish government being evacuated on FTF turns 1-4, 5-7, 8-10. Instead, use:
- Polish government is evacuated Sep I 39: +30
- Polish government is evacuated Sep II 39: +10
- Polish government is evacuated Oct I 39: 0
- Polish government is evacuated after Oct I 39: -15
Change the +2 Polish VP award for each supplied Polish RE on the map at the end of the game to +10.
The victory conditions for the 2-week-turn game are untested. If they need balancing, the central idea is that the longer the Poles hold out AND/OR the more German casualties they cause, the bigger the victory they win, while the Germans win by having a quick, low-casualty campaign.
OBs, Replacements, etc.: Use the Europa (not FTF) OBs for 1939 Germany, Poland, and Slovakia. Use the FTF OB for the Soviets. Use a replacements rule from SF or FITE/SE.
Since the Soviets don't have a replacement rate in the FTF OB, give them 5 inf and 3 arm RPs a turn starting Nov I 39. Since neither the Germans nor the Soviets have resource point reinforcements specified, give the Germans 3 and the Soviets 1 each I turn starting Oct I. The Soviets, however, cannot get replacements or resource point reinforcements before they intervene or on the turn of intervention. Note also that the Soviets start with no resource points.
Use the special replacements rules from SF or FITE/SE. All forces get special replacements; the Poles get them at the same rate as the Germans.
Final Note. There's probably some points I missed and there's some effort involved to use SF or BF rules in the game, but these hints should be enough to get you going.
 War in the Desert
Operation Compass: Western Desert and War in the Desert
War in the Desert handles Operation Compass a bit differently than the original Western Desert did. A.E. Goodwin and I (with suggestions from Frank Watson) reworked the Operation Compass setup to:
- Recreate the gap in the Italian fortified camps between the Sofafi group of camps and Nibeiwa. This gap is not really a whole Europa hex wide, as WITD shows. It is, however, well over half a hex wide, so just a minor repositioning of Italian forces creates this gap at Europa level. O'Connor's forces drove through this gap in their surprise attack, both to attack the forward camps from the rear and to reach the coast behind the Italians at Sidi Barani.
- Give the Italians reduced ZOCs initially, to show their negligent patrolling and reconnaissance efforts as well as their slow ability to react to developments. This allows O'Connor's forces, particularly the 7th Armoured Division, to push up to the Italians and through the gap.
- Set O'Connor's forces further back, closer to Matruh, in initial deployment. This thus recreates their actual drive across the desert on the nights of 7/8 and 8/9 December 1940 (they attacked early on 9 Dec.).
- Add an Italian demoralization rule, so that cut off Italian forces defend poorly (a rule amply justified by what actually occurred).
- Use up the Allied rail capacity, so that all those brigades in the Delta don't rail up and hit Sidi Barani like they did in Western Desert. (This was the most ahistoric aspect of the older game.) Overall, the Allies in WITD have fewer forces for Compass but the Italians are weaker due to the demoralization rule.
All this means the Operation Compass forces deploy further back in WITD than in WD. This does leave the Allied attack supply sitting a couple hexes forward of the attack force, but to move it back too would have required adding special SMP rules for the first turn (so that it could move far enough forward), a step I didn't want to take. It may look slightly odd on the map, but in reality it is actually still behind the British lines, even if it does not appear to be at Europa scale. The British had various patrol and recon forces forward, watching the Italians, but most of these simply do not show up at Europa scale (but see the sidebar below). The net effect was that the Italians had no effective control or intelligence over much territory in front of their camps—the British controlled it.
Sidebar. One Europa-scale unit did operate for a while in the forward area. A crucial component of the Operation Compass plan was that the Italians shouldn't patrol or station forces in the gap between the camps, as they might then have sufficient time to react when the British attack forces arrived there. To discourage the Italians from entering the gap, on 19 November 1940 the support group of 7th Armoured Division entered the gap and chased out the small Italian patrolling forces there. If it sounds incredible that a brief British incursion between the camps would DISCOURAGE the Italians from guarding the gap, then I fully agree with you -- this just goes to show how low the Italians' initiative was after sitting in camp for months, and how well the British judged and exploited it.
Q: It thus looks like you can't expect to recreate Compass if you start the game with Graziani's advance into Egypt in September 1940. Correct?
A: Sensible players will not voluntarily do what the Italians did. If loaded down with idiot rules to try to force them to follow history, the players will do the minimum to meet the rule and the maximum to optimize their position. And, I don't see how even the most heavy-handed rule would force the players to move their forces so that they could be surrounded.
In a greater Europa context, however, I don't see this as much of a problem, for two reasons:
The Italian player will try to do better than history, but so will the British player. Operation Compass was conceived as a big raid on the Italians and only turned into a major offensive after its initial success was so overwhelming. As a British player, I would increase my forces facing the Italian as much as possible and when I hit them I'd hit them hard. Better Italian play with better British play probably all works out OK in the end.
If the above is not enough, Operation Compass is one of those few occasions in the war that could justify an in-campaign surprise turn.
Operation Torch
Q: One thing I like about Europa is that you rarely have preordained events occurring during the game that you historical counterparts would not know about. For example, in SF, the Axis doesn't know if D-Day is going to occur in June 1944 or at some other time, in Normandy or somewhere else, or even at all. However, in WITD, both sides know from the start that the Allies are going to storm ashore in French North Africa on Nov I 42 and can play the game accordingly. I realize there's no easy way around it, given the structure of WITD, so I'm not complaining. However, will there be better options available in larger campaign games in Europa?
A: Yes, indeed. The Allies will be able to invade when and where they want, based on their available forces.
I looked at making Torch a variable event in WITD, somewhat along the lines of the Axis special operations forces (a pool of forces available for use in specified time periods). However, this was difficult to do in the context of the game—the OB would change constantly, for one example, and a fair portion of the Axis OB would also have to be conditional, in response to when Torch occurred.
Another factor was the timing of the invasion. Torch was decided upon in the summer of 1942 as a large-scale, joint US-British invasion, requiring lots of planning, training, and assembly of forces. One crucial bottleneck was shipping for the US forces, including among other things the conversion of "conventional ships to assault vessels" (see The Decision To Invade North Africa (TORCH) at http://www.army.mil/cmh-pg/books/70-7_07.htm). (I mention this specifically because you may occasionally see the claim advanced that troop transports were a significant limiting factor for the Allies, separate from shipping. However, conventional shipping can be converted to troop transports, so the true underlying limit is the overall state of the Allied shipping resources.) Despite Roosevelt wanting the invasion to occur in October (see Timing of Torch at http://www.army.mil/cmh-pg/books/wwii/Sp1941-42/appC.htm), the US Navy found that the earliest everything could be ready for the invasion was 7 Nov. 1942 (and the invasion actually occurred on 8 Nov.). So, an earlier landing on the scale of Torch seemed out of the question in the context of WITD.
I could also see no strong reason why the Allied player would want to delay Torch to a later time, like 1943 or even Nov II 42. So, for WITD, having Torch hardwired for Nov I 42 worked and was the simplest solution, despite the valid objection that players know its coming from the start of the game.
WITD Q&A
Q: WITD has no rules for "Bombers as Air Transports". Why not?
A: Bombers were not used as emergency transports to any significant extent in this theater of the war. So, I didn't include the rule in this game. You can use it if you wish, and I believe Wavell's War includes it as an optional rule.
Q: What would be the game effects on the Allies if the Axis took Gibraltar (such as by a successful airborne assault), as unlikely as that would probably be?
A: Ignoring any highly debatable morale or political effects should Gibraltar fall (such as forces on Malta fighting poorly, Vichy France granting the Axis transit through Tunisia, or Spain doing more for the Axis), it would depend on whether the Axis were able to establish significant air and naval forces at captured Gibraltar. If they could, this would discourage the British from operating in that area, in particular passing through the Straits of Gibraltar. In this case, the main effect on the British would be to make Malta harder to reinforce and supply. Ships bound for Malta would now have to sail around Africa and then make the run from the Suez Canal rather than from Gibraltar, likely a 3-4 week delay.
The longer run would also strain already-tight Allied shipping resources. A ship could easily make two or more runs to Malta from Britain via the Straits than it could by going around Africa. Since Malta was very important for the North African campaign, shipping to lesser-priority places would have been affected, likely slightly weakening the Allied position in those places.
Since almost all shipments to Egypt are already going around Africa, the fall of Gibraltar should not impose additional difficulties on the British forces in the Middle East.
Axis control of Gibraltar would make any Allied Operation Torch-style landing in Northwest Africa considerably more risky, as Axis airpower from Gibraltar could threaten the invasion fleet. It is conceivable that the Allies would judge it too risky to try to invade the Mediterranean coast of NW Africa, just like they historically ruled out landings in eastern Algeria and Tunisia because of Axis air power on the nearby islands of Sardinia and Sicily. The Allies might choose to land on the Atlantic coast of Morocco. However, the greater distance from there to Tunisia would likely mean the Germans would have more time to establish stronger defenses in Tunisia and nearby regions.
Taking just Gibraltar, of course, does not seal off the Mediterranean from the Allies. The Axis really have to grab both Gibraltar and the Suez Canal to do this.
With a neutral Spain, it is not clear that the Axis could hold Gibraltar after seizing it in an airborne operation. Its distance from Axis airbases means that the Axis might have trouble getting their short-range, single-engine fighters there, but these would be necessary for its defense. Conceivably, the British could concentrate their carriers and get air superiority over Gibraltar. This would allow the Royal Navy to operate in the area, with the likely effect of driving out any Italian naval forces that tried to operate there. (The British, however, would be operating far from their closest safe naval bases in Britain, which would tend to diminish their power.) All this would represent a considerable diversion in the naval war for the British, which might have repercussions elsewhere.
Q: The Libyan Fantasy must take place in 1941 and costs 4 Italian arm RPs. The Italians in WITD receive no arm RPs for all of 1940 or 1941. Do the Italians have to rely on German foreign aid?
A: Don't forget that you can also disband and scrap Italian units to get the RPs you need. When you count up the number of Italian armor RPs in units that start the game in Africa or go there in 1941, the Italians can easily build up armor enough for the Libyans unless they take losses. For example, just counting tank battalions, the Italians start with three 1-6s and get another three on Dec II 40-Jan I 41, so in theory the Libyan armored division can be formed as soon as Jan I 41!
Q: Second Front's extended range air rules allow fighters to fly extended range missions. WITD's do not. Why? No drop tanks in 1939-1943?
A: Well, there were some, but they weren't available for most fighters for most of the period covered in WITD like they were for SF. Overall, the game works simply and acceptably accurately by excluding drop tanks totally than including them for everyone at all times.
Europa is a trademark of the Europa Series Wargames Foundation.